- 01 Nov 2023
- 5 Minutes to read
- Print
- DarkLight
Running Services
- Updated on 01 Nov 2023
- 5 Minutes to read
- Print
- DarkLight
To run services on the Edge iNode, first add a local network on the Edge iNode. (See instructions for adding a local network for your Edge iNode for your cloud environment in Chapter 4 Provisioning and Launching iNodes.)
In this section, we include the general instructions for running edge services as well as specific instructions for Niagara4 and SkySpark.
General Instructions for Running Services
To add a service, the steps include:
- Adding the service to an Edge iNode
- Associating it with a local network
- Supplying service-specific options
In general, these are steps to run an iNode Edge service:
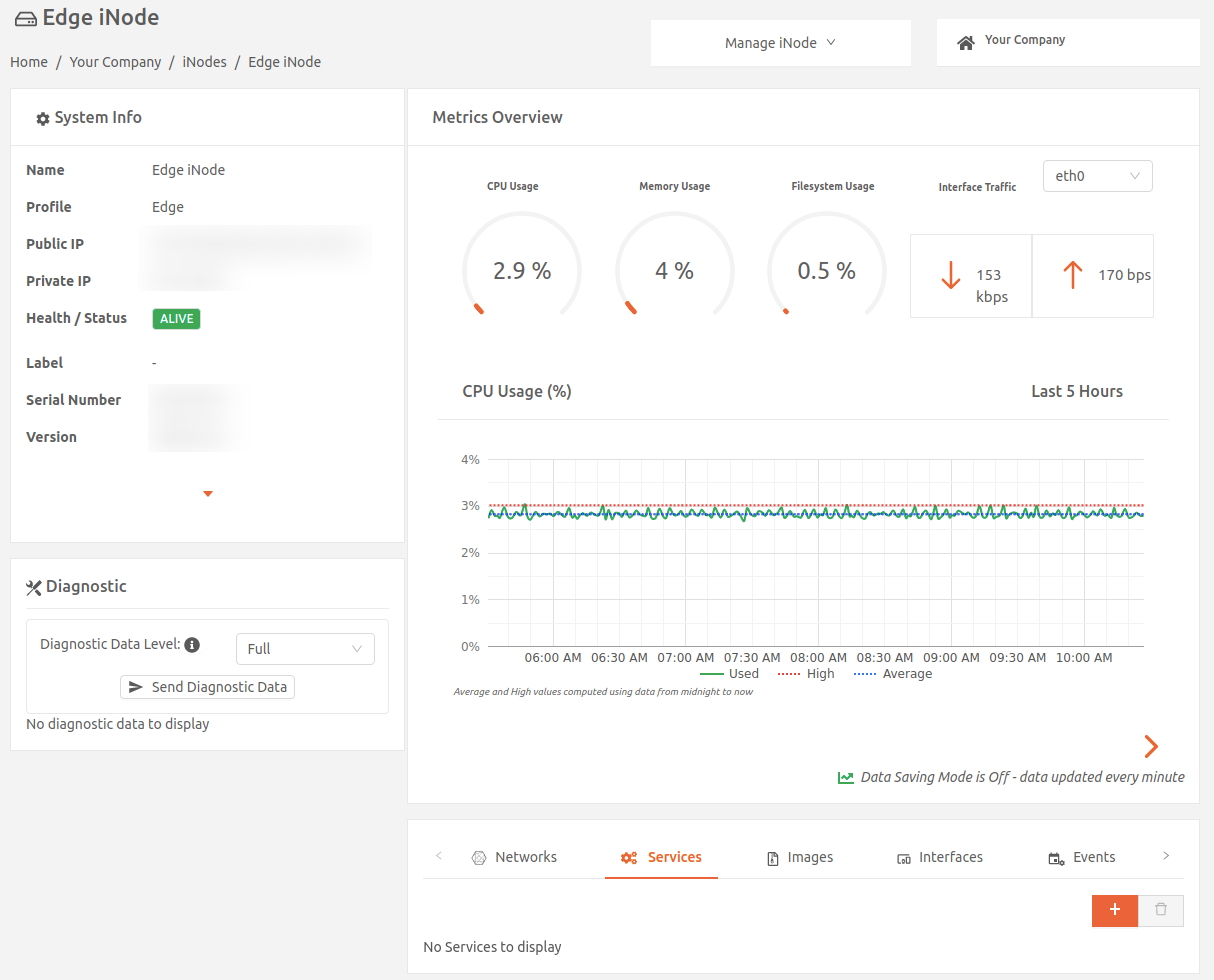
- From the iNodes page in the Secure Edge Portal, select the name of the Edge iNode to display the iNode details page.

- On the Services tab, select the plus icon (+) to display Add Service.
- Select a service. The following predefined services are available (for information on obtaining product licenses or other subscription inquiries, please reach out to Customer Success or Support):
Marketplace Partners: These services require additional software licensing.- Mapped — Independent data layer
- Nantum — Prescriptive data for building operators
- Niagara 4 — Tridium N4 framework
- Normal — Installer for Building IoT
- SkySpark — SkyFoundry SkySpark Analytics
- ThingWorx Edge — ThingWorx Edge platform
Open Source services: In addition, a collection of core infrastructure services may be available at no extra cost, if your company has licenses for Edge Compute (see Secure Edge Core Services). - Kea — An open-source Dynamic Host Configuration Protocol (DHCP) server. You can use this service to hand out and manage the IP addresses of hosts and services on your local network (requires the PostgreSQL service to store DHCP data).
- PowerDNS — An open-source Domain Name System (DNS) server. You can use this service as a DNS server for hosts and services on your local network (requires the PostgreSQL service to store DNS data).
- PostgreSQL — An open-source object-relational database system (required by the Kea and PowerDNS services to store data).
- NTP — A Network Time Protocol server that runs the Debian 10 ntpd daemon. It uses the local clock as the time source. You can use this service to synchronize the clocks of all hosts on your local network.
 You can also select Custom to add a custom service, which is recommended only for advanced users. If you want to add a custom service, refer to the Creating a Custom Service for instructions.
- Enter the name for the service instance.

- Select the Network to which this service instance will connect.
- If the Network for this service is configured to use dynamic service addressing (default), then the iNode allocates an IP address dynamically for the service instance. If the network is configured to use static service addressing, specify the static IP address for the service instance.
- You can configure DNS servers for the service. By default, the service uses the iNode's DNS Servers configuration. Current configuration is displayed under DNS Servers IP Address. (For more on configuring DNS servers, see Configuring DNS Servers for Services.)
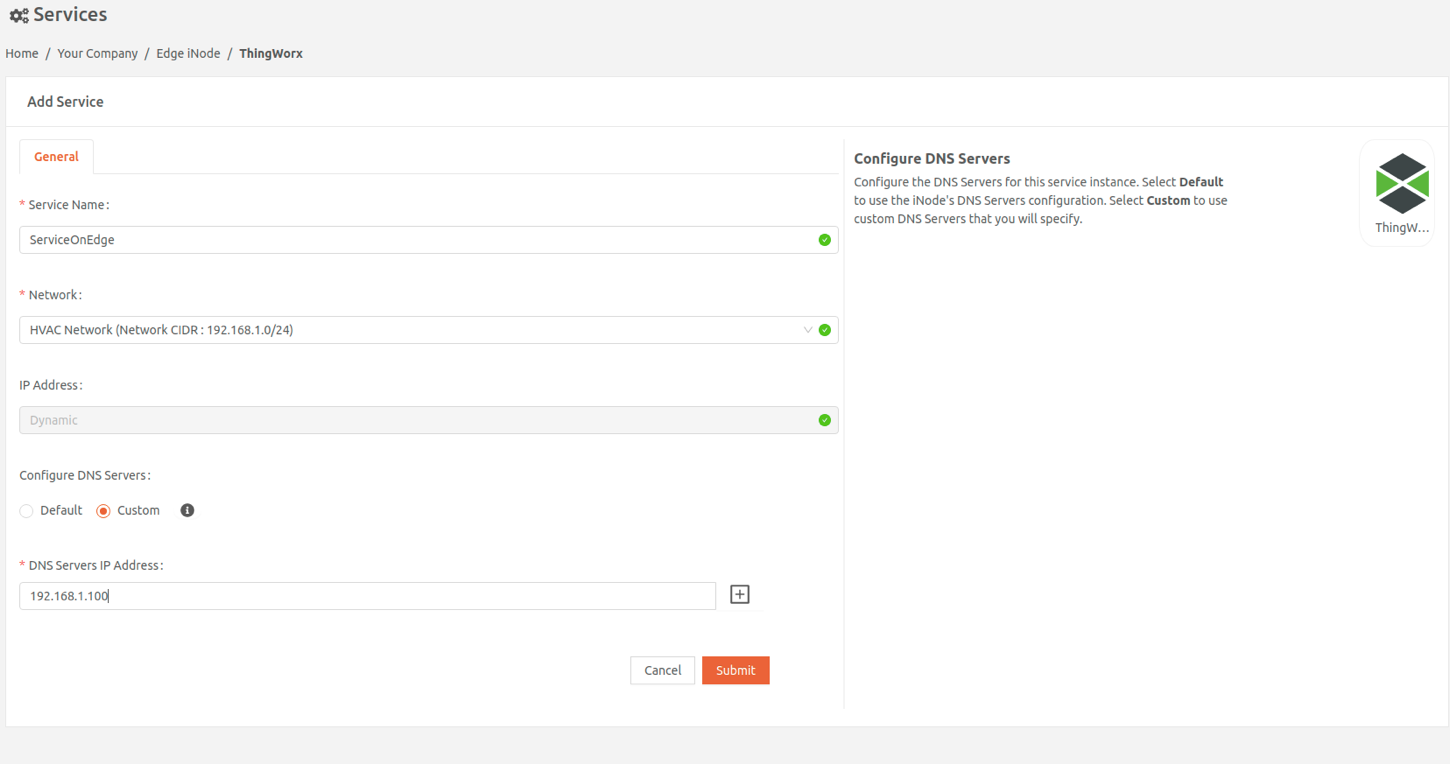
- Fill in the service-specific options for the service you selected.
- Select Submit.
Running SkySpark as a Service
To run SkySpark as a service on an Edge iNode, follow the steps in this section.
Add SkySpark as a Service and Associate a Network
- From the iNodes page in Secure Edge Portal, select the name of the Edge iNode to display the iNode details page.
- On the Services tab, select the plus sign (+) on the top right to display Add Service.
- Select SkySpark.
- On the Add Service page, enter a name for this service instance.

- Select Next to go to the Network tab.
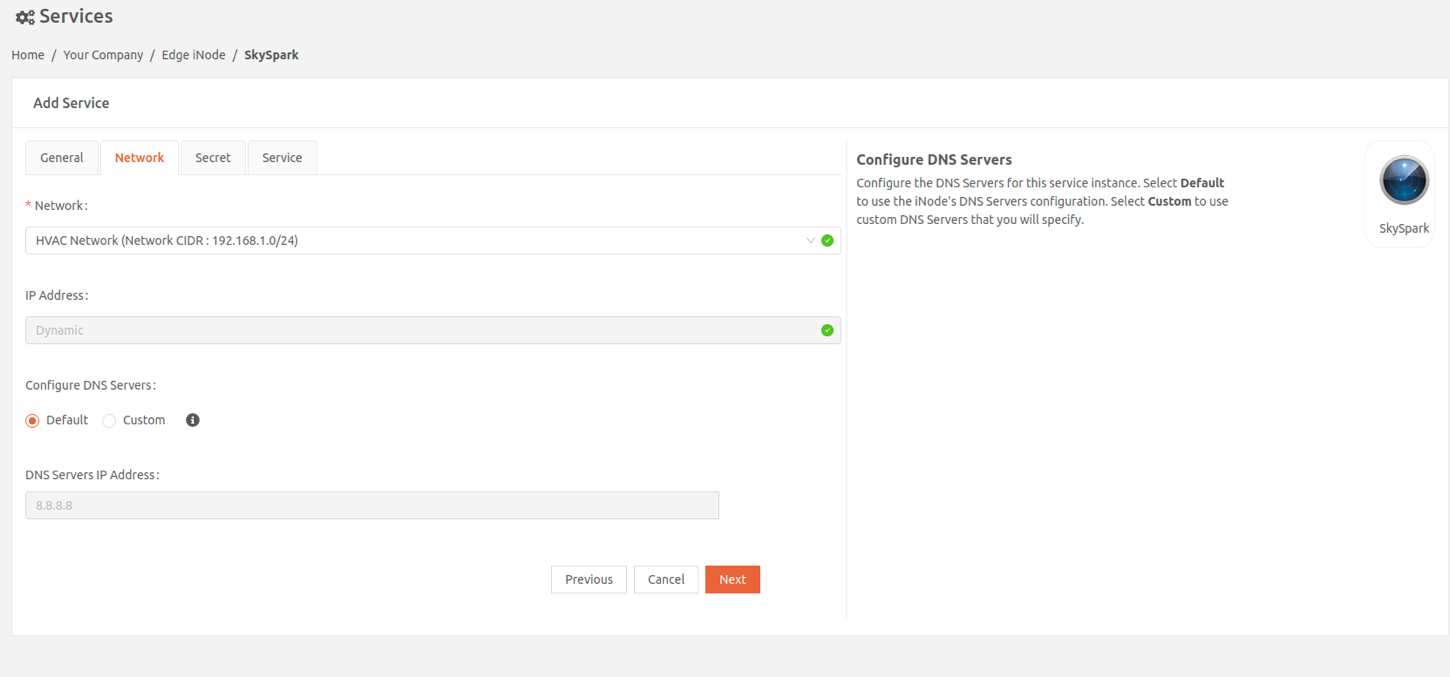
- You can configure DNS servers for the service. By default, the service uses the iNode's DNS Servers configuration. Current configuration is displayed under DNS Servers IP Address. (For more on configuring DNS servers, see Configuring DNS Servers for Services.)
Provide the SkySpark License and Enable Secure Shell Access
A license is required for running SkySpark. You can upload a new license or use a previously uploaded license.
- Select Next to go to the Secret tab.
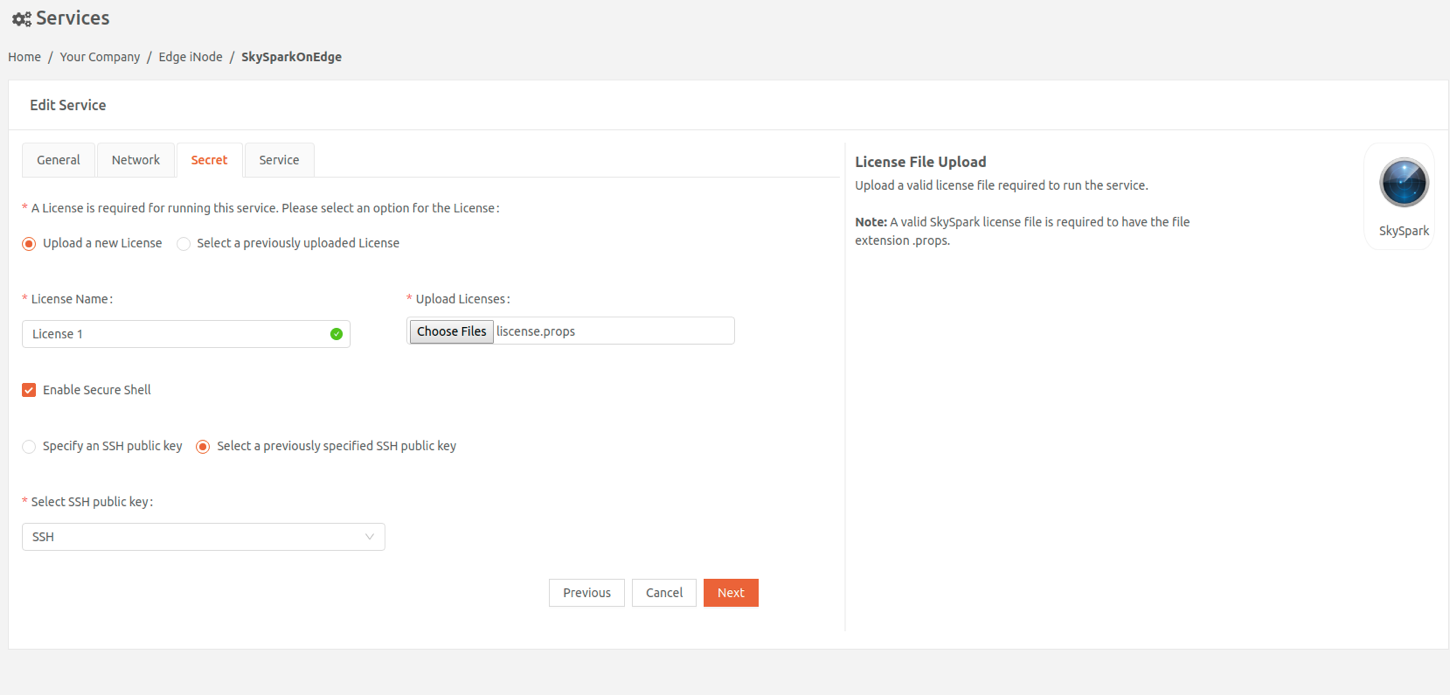
- To upload a new license, select Upload a new License, enter a name for the license and specify the license file to upload. To use a license you’ve uploaded previously, choose Select a previously uploaded License and choose the license to use from Select License.
- If you want to access the service securely, you can optionally enable Secure Shell. To use Secure Shell, you need a public and private key pair. Provide the public key here. To specify a new public key, select Specify an SSH public key, enter a name for the key and paste the key as plain text or base64-encoded format. Otherwise, choose Select a previously specified SSH public key and select the key to use from Select SSH public key.
- Select Next to go to the Service tab.
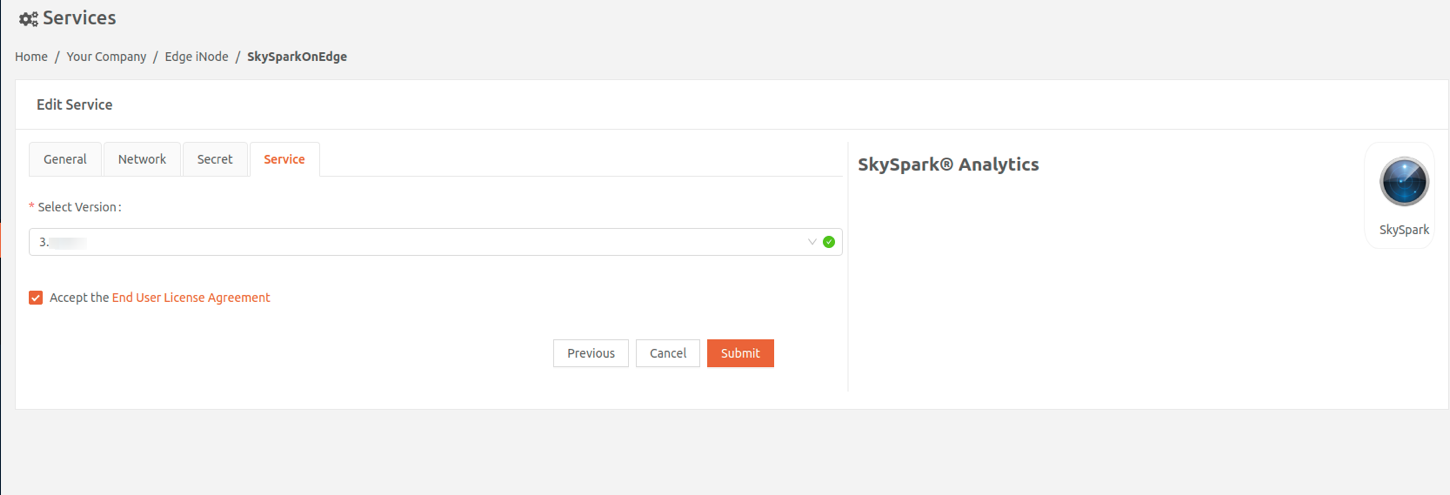
- Select the SkySpark version.
- Select Accept the End User License Agreement to accept it.
- Select Submit.
You’ll find status and information on the newly added service in the Services tab. Select the name of the service to display the status and information on the containers in the service. When the service is successfully running, its status will change to HEALTHY. This may take a few minutes.

Once the service is running, you can access the SkySpark instance from a browser using the IP address of the service. Use username su and the password that you specified above to login to SkySpark.
Running Niagara4 as a Service
To run Niagara4 as a service on an Edge iNode, follow these steps:
- From the iNodes page in Secure Edge Portal, select the name of the Edge iNode to display the iNode details page.
- On the Services tab, select the plus sign (+) on the top right to display Add Service.
- Select Niagara4.

- Enter the name for the Niagara service instance.
- Select the Network to which this service instance will connect.
- If the Network for this service is configured to use dynamic service addressing (default), then the iNode allocates an IP address dynamically for the service instance. If the network is configured to use static service addressing, specify the static IP address for the service instance.
- You can configure DNS servers for the service. By default, the service uses the iNodeâs DNS Servers configuration. Current configuration is displayed under DNS Servers IP Address. (For more on configuring DNS servers, see Configuring DNS Servers for Services.)
- Select Accept the End User License Agreement to accept it.
- Select Submit.
You’ll find status and information on the newly added service in the Services tab. Select the name of the service to display the status and information on the containers in the service. When the service is successfully running, its status will change to HEALTHY. This may take a few minutes.


 You can also select Custom to add a custom service, which is recommended only for advanced users. If you want to add a custom service, refer to the


