Using VLANs on Edge iNodes
- 12 Apr 2023
- 1 Minute to read
- Print
- DarkLight
Using VLANs on Edge iNodes
- Updated on 12 Apr 2023
- 1 Minute to read
- Print
- DarkLight
Article summary
Did you find this summary helpful?
Thank you for your feedback
Virtual Local Area Networks (VLANs) divide a single existing physical network behind an Edge iNode into multiple logical networks. This permits traffic on each VLAN to be isolated from other VLANs.
In this section, learn how to use the Secure Edge Portal to provision VLANs.
VLANs are enabled for your company’s account by View Secure Edge based on your Subscription Agreement. For more information about getting this feature enabled, contact your Account Manager.
Before you provision a VLAN, you need to know the VLAN IDs on the switch to which the iNode local network connects.
To add a VLAN, follow these steps:
- From the the Secure Edge Portal dashboard, select the iNode icon to display the iNode page.
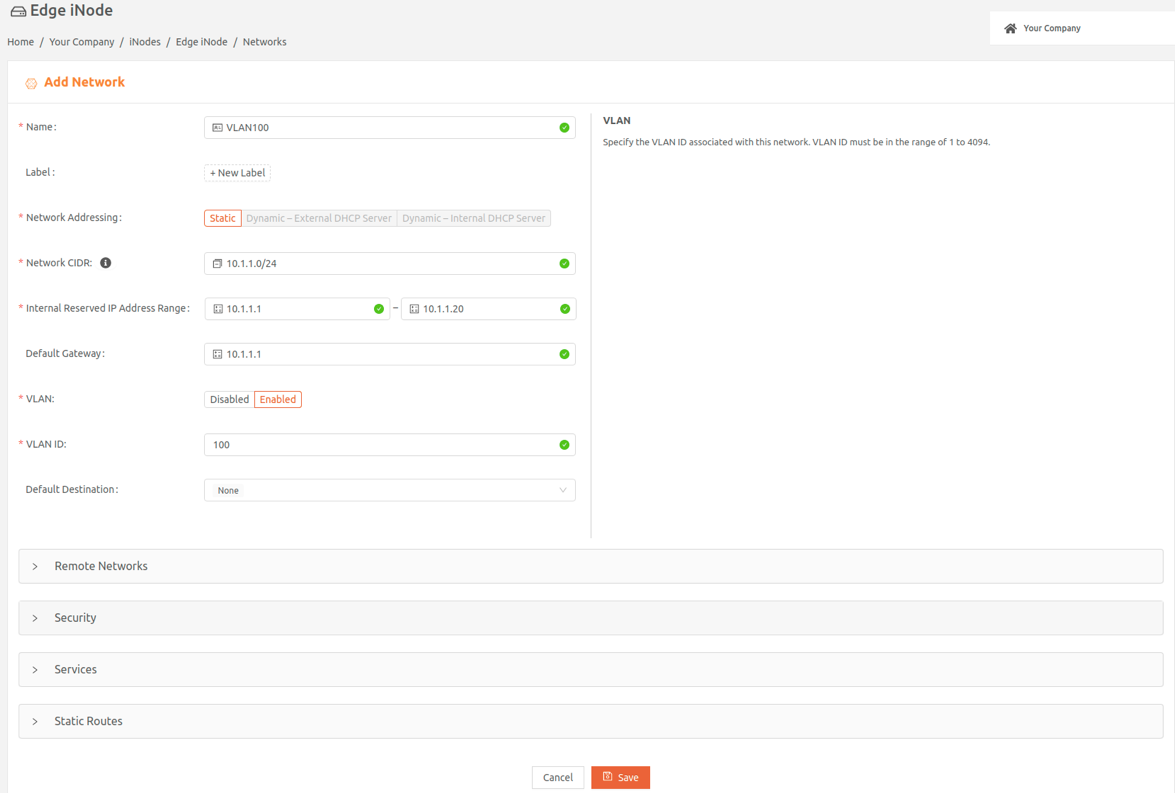
- Select Add Network to display the Add Network page.

- Add Name, Network Addressing, Network CIDR, and Internal Reserved IP Address Range.
- Set VLAN to Enabled for a VLAN for tagged packets or Disabled if you are adding a native VLAN for untagged packets. You can have only one disabled VLAN per iNode.
- Set the VLAN ID for enabled VLANs to be a unique number for that network, in the range of 1 to 4094. You can’t set a VLAN ID for a native (disabled) VLAN.
- Select Save.
Repeat the process if you’d like to add more VLANs.
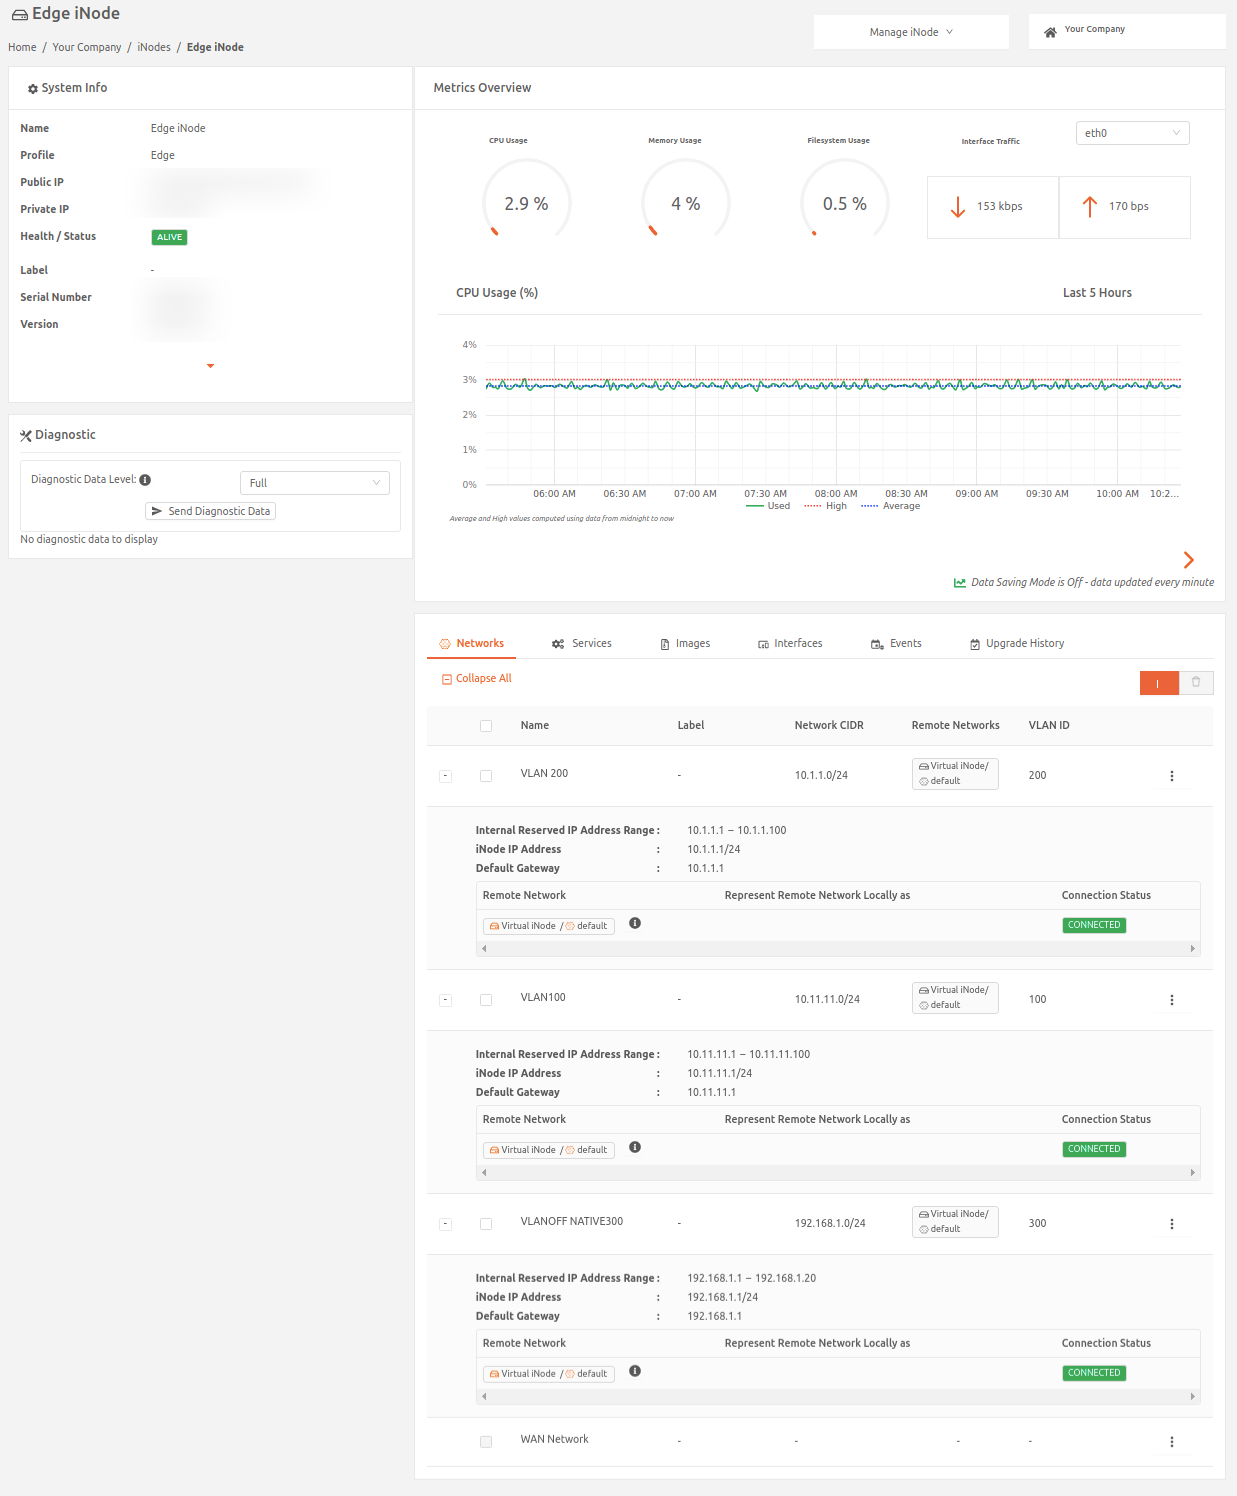
After you’ve added one or more VLANs to the Edge iNode, you’ll see the VLAN ID appear on the Network Configuration page.

Was this article helpful?


